DIY Candied Orange Slices
This post may contain affiliate links. We may earn a commission if you purchase via our links. See the disclosure page for more info.


Candied oranges are such a great treat for the winter, and they are so easy to do with a dehydrator or an oven! Learn how to create these special sweet tangy treats for your family or for Christmas gift-giving.

Candied oranges are incredibly easy to make, last a long time, and can be done in your dehydrator, oven, or even air-dried.
How to Make Candied Oranges
Equipment:
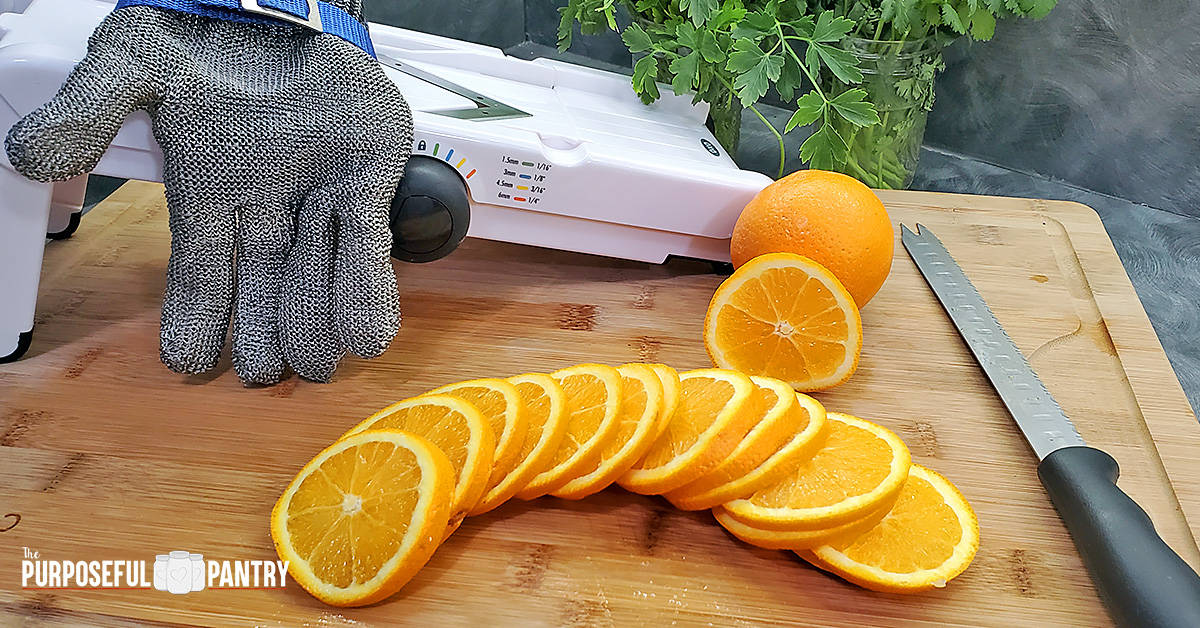
- Deep-sided skillet or stock pot
- Bread knife or mandoline (and a safety glove; please don’t forget it!). A good, sharp knife will work, but I find that bread knives just make it easier.
- Baking sheet with a cooling rack for air or oven drying
- Dehydrator (for machine drying)
Ingredients
- Oranges (organic oranges are best, but use what you have access to)
- Sugar
- Water
- Melting Chocolates if desired
Instructions:
- Wash oranges (use a tablespoon or two of baking soda in a sink full of water to allow the oranges to soak in and give a light scrub).
- Using a breadknife or a mandoline, make 1/4″ slices.
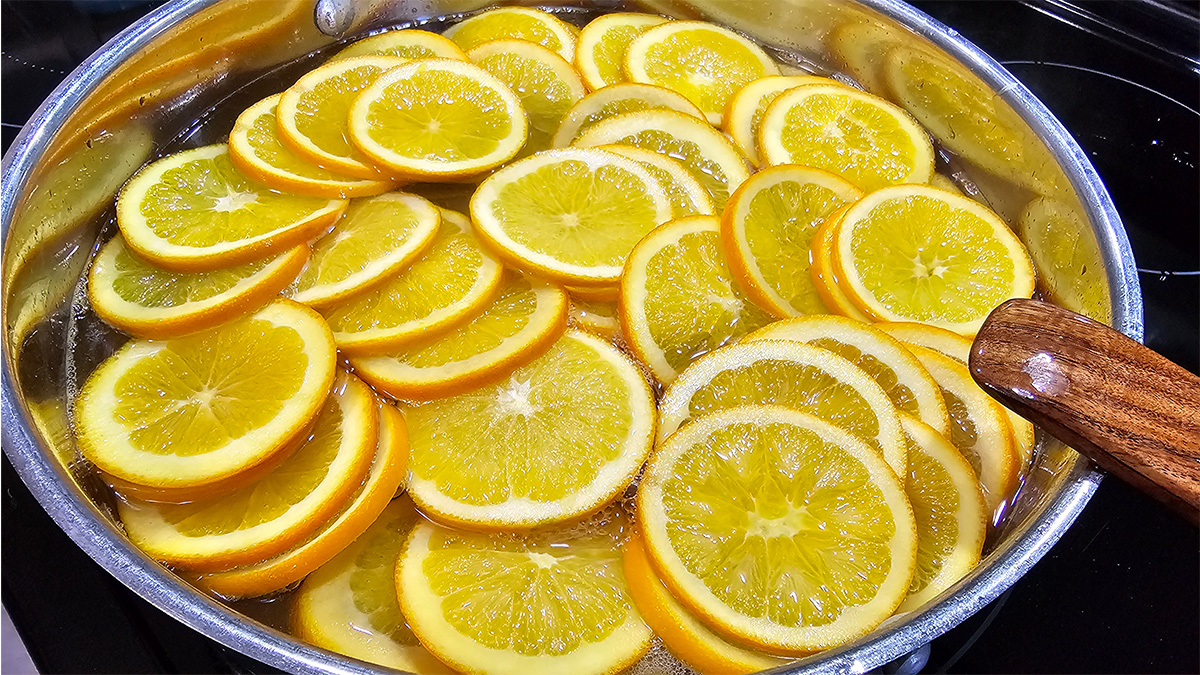
- Add 4 cups of sugar to 4 cups of water (1:1 simple syrup solution) and bring to a boil in your deep skillet or large saucepan. I used 4 cups of each in my large skillet. You can determine how much you need and adjust accordingly.
- Stir occasionally until the sugar is dissolved.
- Add oranges, lower the heat, and simmer for 30-40 minutes, or until the slices are translucent.
- Remove with a slotted spoon into a colander to drain. Alternatively, you can place them right onto your racks to drain.
NOTE: Save that sugar syrup! It is an amazing orange-flavored simple syrup that can be used to flavor cocktails and mocktails, teas, or can be reduced and used as a drizzling syrup for pancakes, waffles, ice cream, or cupcakes!
Dehydrator Instructions:
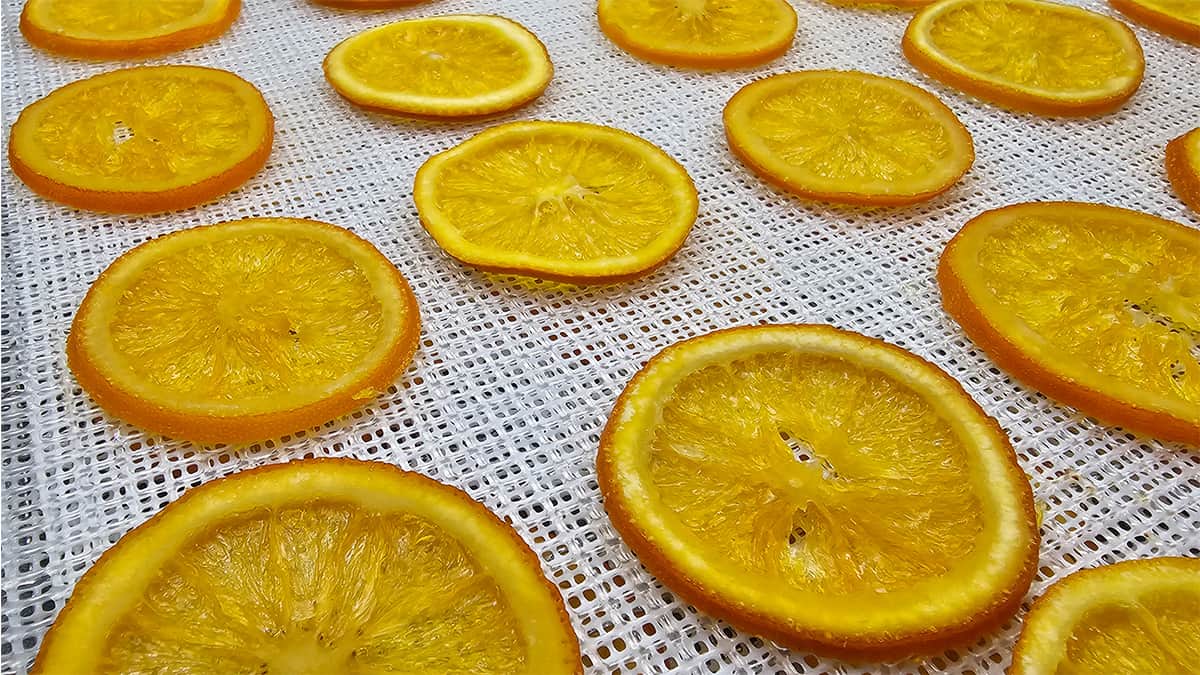
- Place slices onto dehydrator trays in a single layer. They can be close to each other, but don’t overlap. Lining is optional, but I do recommend using mesh liners to help reduce sticking. Parchment paper will also not work unless you are prepared to flip them quite often.
- Dehydrate at 125°F/52° for about 18 hours until dry. These will not break apart as regular orange slices, but should be easy to break, show no moisture, and not be tacky once cooled. (Do you need a hand? Get a magnetic temperature guide today!)
- Store in an airtight container with a moisture absorber.
Oven Directions:
- Place orange slices onto baking sheets lined with cooling racks. You may want to line your baking sheet with parchment paper to help clean up, but I find it’s fairly easy to do without it.
- Dry at the lowest temperature your oven will go. Allow oranges to dry, but keep an eye on them to ensure they do not burn.
- I don’t recommend this if your oven doesn’t go below 180°F as higher temperatures can turn the sugars dark.
Tip: You can prop the door open to help reduce the heat and allow the moisture to escape. It may take about 8-15 hours to dry.
Air Drying Instructions
- Place orange slices onto baking sheets lined with a cooling rack.
- Allow to air dry for about 24 hours, or until completely dry (if your home is humid, it may take longer).
Storage
Store these in an airtight container for a few months.
They can be stored in the fridge if you’d like, or can be frozen, but do put some wax paper or parchment paper between layers to help with sticking when defrosting. This is not the best storage method, but can serve in a pinch if your environment warrants it.
Darcy’s Tips:
- If the surface of the orange is tacky, they are not quite dry. You can pop them into a low oven to finish them quickly.
- After a few hours, you can dip the oranges in sugar if you’d like to make them look like sugared candied oranges.
- Candied oranges do not need to be refrigerated if they are fully dry. They should last for months and months on the shelf. It is helpful to include a moisture absorber to help with moisture control.
- The blanching and ice bath process is not as necessary for candied oranges as for chocolate-covered orange slices. The simmering process in sugar helps reduce the bitterness, but feel free to do it if you wish.
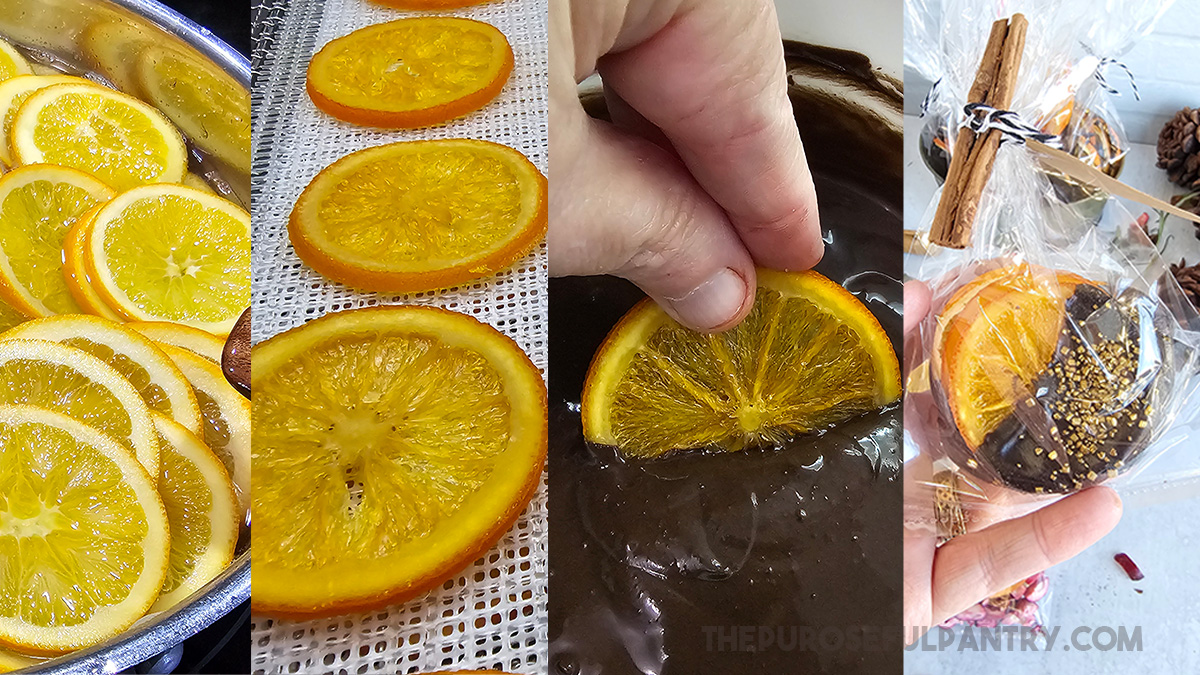
- Consider dipping in chocolate, once finished, for a beautiful candy!
- Do this with only the rinds in strips for decor. Orange peels will curl up to make pretty garnishes for drinks, cakes, and so much more!
- Try this with lemons for a great treat for making teas!
Uses:
- You can use candied orange slices for decor on a cake or bread.
- You can break them into pieces and serve it in oatmeal.
- Break into smaller pieces for trail mix.
- Dip in chocolate and sprinkle with flaky sea salt, crushed pistachios or decorative chunky sugar.
- Slice into it and place on cocktail glasses as garnish.
More Ideas with Oranges


Variations:
- Use the rind only, and reduce the simmering time to 10-15 and dip in sugar, then air dry.
- Peel the oranges first, then slice and do this process — or — remove the rind with your fingers. Be gentle so you don’t break the segments.

Chocolate Dipped Dried Orange Slices
Equipment
- Double boiler Or microwave
- Parchment paper Silicone sheets will work as well.
Ingredients
- Dried orange slices.
- Dipping chocolate. I used the Wilton Brand , but any dipping chocolate wafer will work fine and be convenient. You can use chocolate chips as well. You can use milk chocolate or dark chocolate or white chocolate. It’s all what you prefer.
- Sprinkles: You can use flaky sea salt salt , chunky sugar crystals, finely ground nuts such as pecans or pistachios, etc.
Instructions
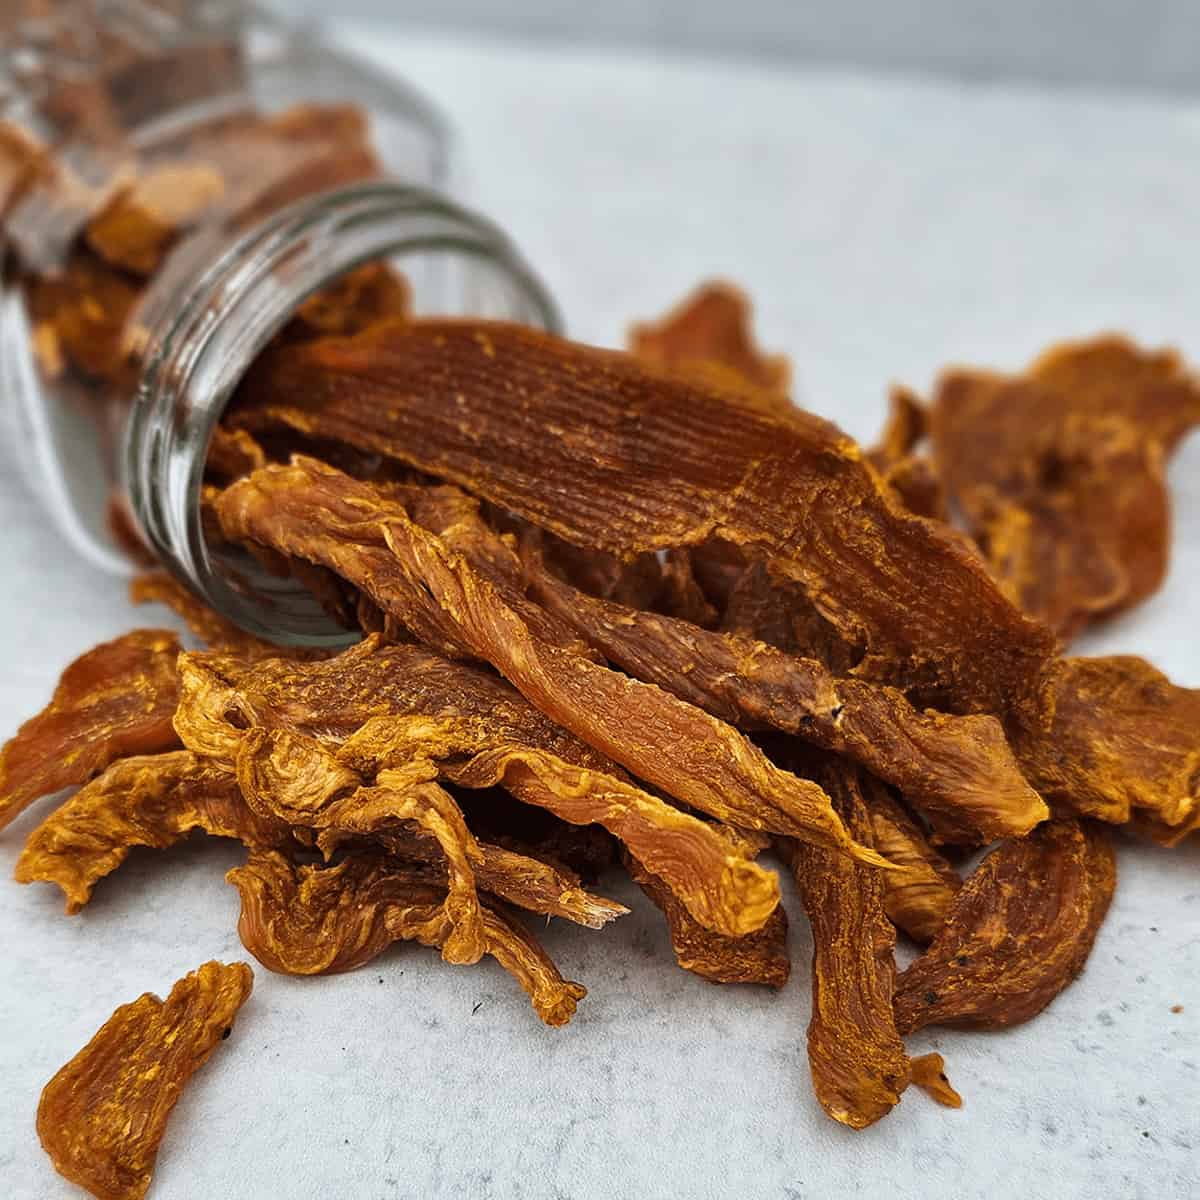
- Please review these full directions on how to dehydrate oranges. Quick instructions: slice less than 1/4″, dry at 125°/52° for up to three days, or place into an oven at the lowest possible temp (below 125F helps retain the pretty color) and dry until they break easily.
- Melt chocolate per directions on package. Use a double boiler on your stovetop or a microwave.
- Dip 1/2 of a dried orange slice in chocolate.
- Sprinkle topping if desired.
- Place onto parchment or silicone-lined baking sheet to dry and harden (I gave it an hour).
- Place into an airtight container for storage.
Darcy’s Tips
- Cook time in the instructions is actual drying time after dipping.
- Plan ahead if making these for gifts. Drying oranges can take a couple of days depending on your dehydrator.
- Store in an airtight container until ready to package and give as gifts.
Nutrition
Nutritional information is an estimation only. Nutrient information for dehydrated foods is based on fresh. Use 1/4 of the servicing size for the same nutrient information. Thus 1 Cup of fresh fruit has the same sugars as 1/4 dried.
©ThePurposefulPantry. Photographs and content are copyright protected. Sharing of this recipe’s link is both encouraged and appreciated. Copying and/or pasting full recipes to any social media is strictly prohibited.

I tried this recipe using navel oranges sliced 1/4”. After simmering in the simple syrup for 45 minutes basically the flesh had fallen off and those whose flesh did not were quite ratty looking. What did I do wrong?
Thank you
Pat k
Simmered too long. The instructions call for 30-40 minutes OR until the slice is translucent.
I’m hoping you can help! I made these by the gallon last year. This year I’ve started with Meyer Lemons. Following instructions…the fruit is tacky after 18 hours at 121’F, but the rind is hard, like tree bark. I can’t figure out why! I tossed the first batch and tried again. Same problem. Help!!!
Not giving it enough time to dry – don’t pay attention to the time, just dry until they are dry. And there may be a small amount of tackiness because of the sugar – and it will definitely be affected by the relative humidity in your home.