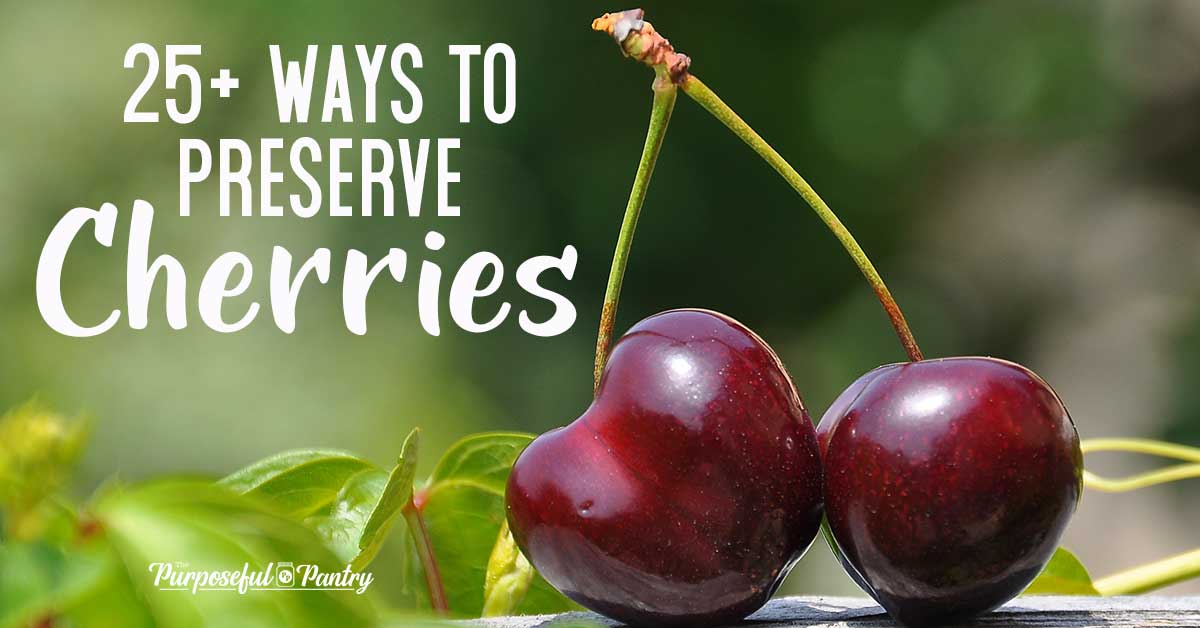
How to Dehydrate Cherries with a Dehydrator or Oven
This post may contain affiliate links. We may earn a commission if you purchase via our links. See the disclosure page for more info.

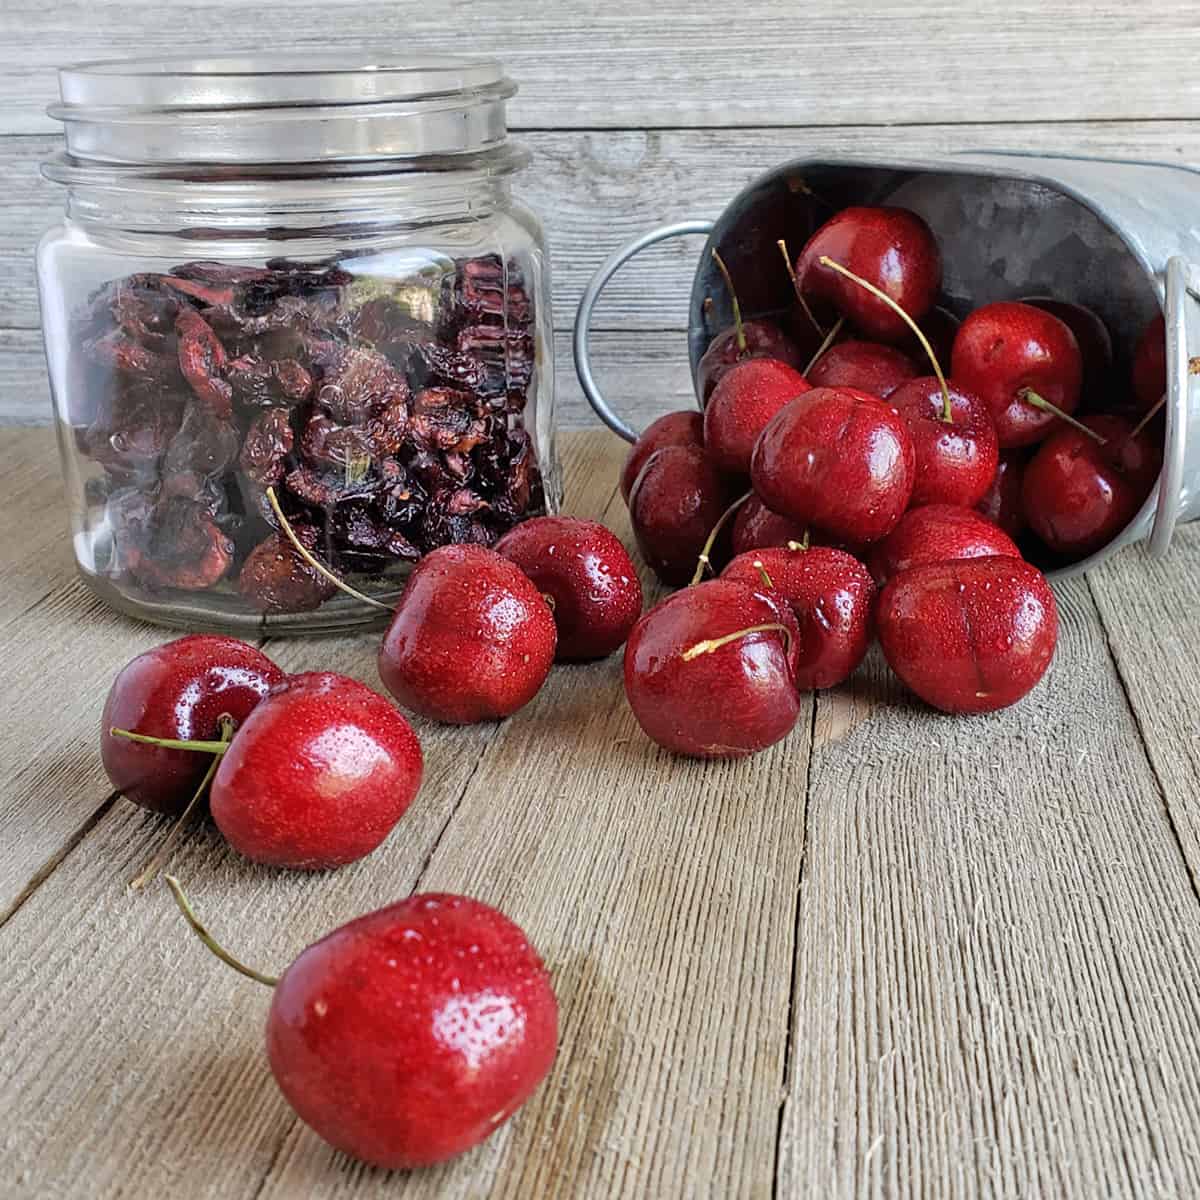
Dehydrate cherries and preserve the fresh taste of cherries to use all year in trail mix, yogurt, snacks, and so many other great treats!
The only thing I knew of cherries growing up was the ones that came out of a can that my grandmother would smother a cheesecake with. I loathed them. And there was no way you were going to get me to eat fresh ones, because I wasn’t a big fan of most fruits. Yep, I was a weird kid.
Then comes the day when we discovered fresh cherries. My oldest son and I were in love. But the season is short, they are expensive, and we needed a way to buy all the cherries when they were at their lowest price, and preserve them for us all year long.
Dry cherries are a wonderful snack to eat, perfect for adding to lunches and trail mixes or oatmeal!
(We just have to remember… don’t eat a ton at one sitting — or you’ll be sitting a lot if you catch my meaning)!
How to Dehydrate Cherries
Quick Instructions: Dehydrate on 135°F/57°C for approximately 12-36+ hrs.
Drying cherries to put up in the pantry is a big summer project for us every year. Dry cherries are great to eat and versatile, and so easy to do!
1. Wash cherries.
First, as with any fruit or vegetable you purchase, you’ll want to wash them.
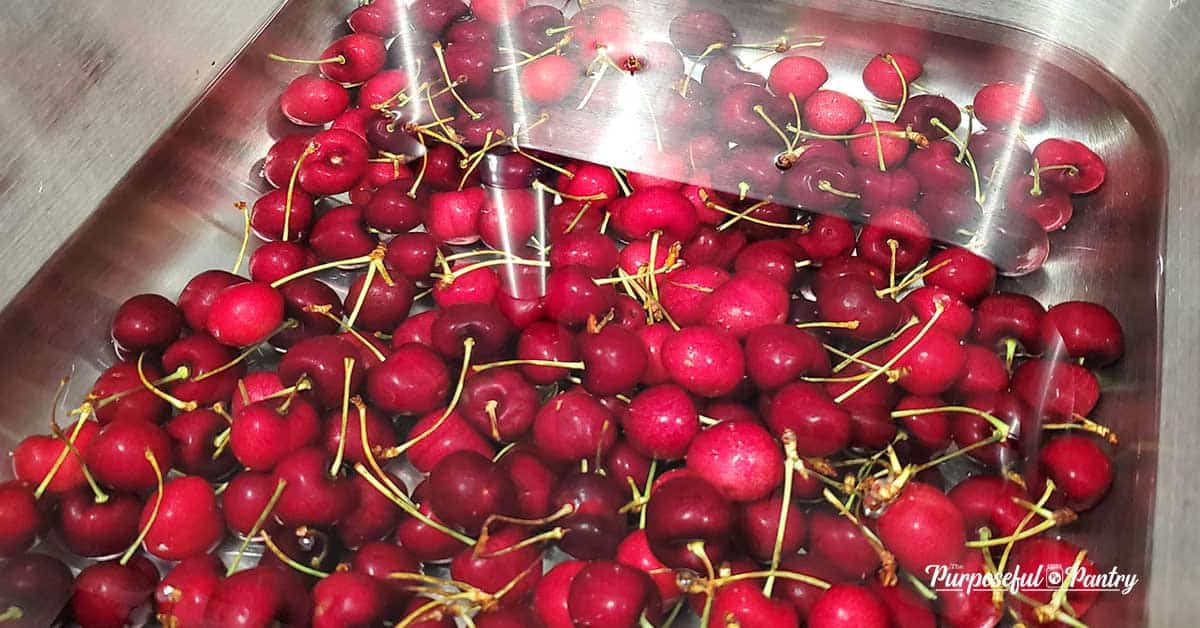
• Place your cherries to dry on a tea towel for a while before adding it to your dehydrator or oven. You may gently pat them dry if you wish.
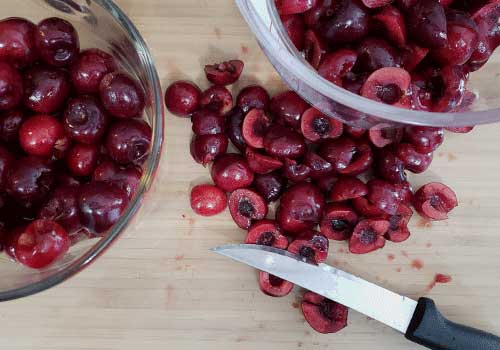
• Once you’ve washed and dried your cherries, it’s time for the picking and the pitting. This is the most tedious of jobs to prepare fruit for dehydrating. So there are tons of tools to make it easier to get through it. But I’m going to show the cherry-pitting tool that changed my life. An OXO cherry pitter is available if the Prepworks is sold out. I’ve not tested any of the knockoffs of the Prepworks version, but OXO rarely gets it wrong.
You’ll find more budget-friendly dehydrator tools here.
2. Pick & Pit
This is a great time to get your kids involved.
- Pull off any stems, and remove any bad cherries. I tend to do this while they are soaking in their bath so that I can kill 2 birds with one stone 😉 Don’t toss those stems, though! Dry them and make tea!
- Pit the cherries. We have tried a lot of different ways to pit cherries, but when we do them in bulk, this is the best cherry pitter we’ve used. I’m confident you’ll be happy with it, too!
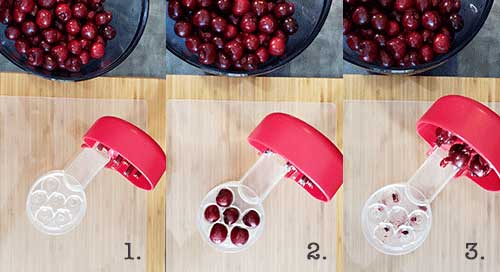
It seriously is the easiest one I’ve ever used. Those single, hand-held pitters are great for a small task, but take 5 times as long when you are working in bulk. This one keeps everything relatively juice-free. I’m not gonna say completely juice-free…
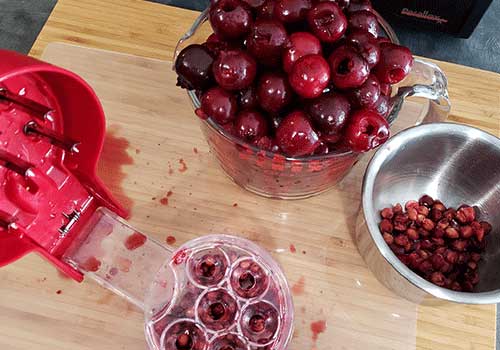
…thus I have a protective cutting surface that I put over my brand-new Ikea cutting board. It’s just a thin plastic one from The Dollar Tree. I didn’t want to stain that new cutting board on its first day on the job!
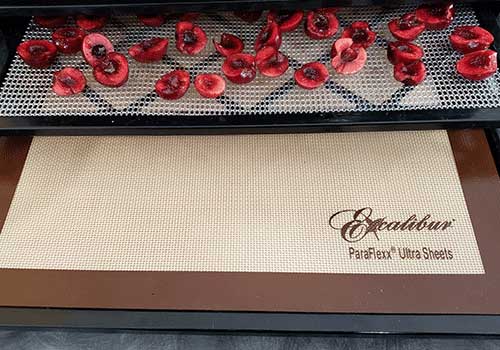
3. Cut cherries in half or quarters
While whole cherries may be fun, we choose to do halves. They dry faster, they are more versatile for our needs, and while it adds a bit of time to the front end to cut them in half, it saves hours on the back end of drying time.
4. Add cherries to dehydrator trays.
Here’s a photo that represents how NOT to load your cherries onto your tray. Can you see what I did incorrectly?
- The fact that they are touching okay, but not optimum. They do shrink a tad, and honestly, they roll around when you move them – you can’t stop the snuggling completely.
- I didn’t pack it full enough? I could add some more, but good airflow is important.
- I didn’t painstakingly make sure that they were all sitting on their roundness, and not flat – you WIN!!
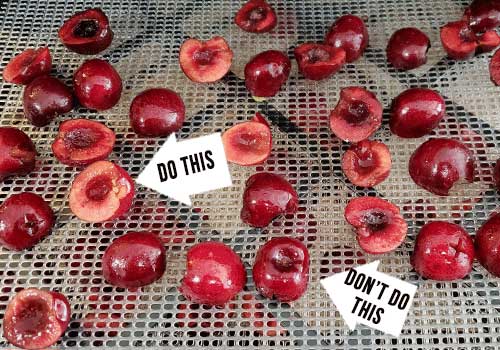
This isn’t going to make your cherries dry poorly. However, they will stick a little less having the skin side down. And cherries stick. Boy, can they stick. However, having them on their round sides helps make sticking a little less of an issue.
5. Dehydrate on 135°F/57°C for approximately 12-36+ hrs
Drying time will vary depending on the muscle of your dehydrator (I use an Excalibur Dehydrator, but have also used a Nesco Dehydrator with similar results, at half the price!). You may need extra drying time if you have a low-wattage machine or one without a temperature regulator.
►Pro tip: Rotate those trays if you’re finding it’s taking a little too long.
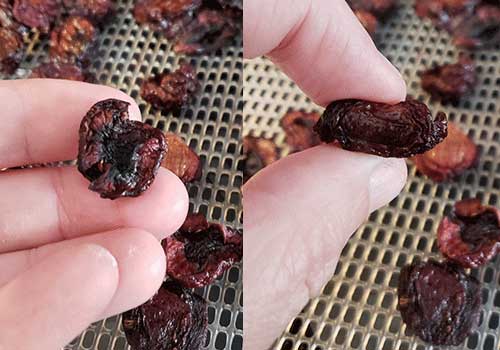
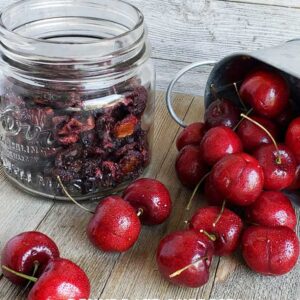
What dried cherries should look like: You want small plump raisin-like pieces. You don’t want to dry them to the point of being hard little rocks if you want them for snacking or adding to granola, etc.
Just to give you a view – this batch was a little over-dried. I used them in oatmeal because they rehydrated well, but they weren’t the best for snacking.
6. Condition
Allow the cherries to cool, but before you put them away for long-term storage, you need to condition them.
Place cherries in a jar that’s about 2/3 full. Shake every day for 7-10 days. If you can see any condensation, toss it back into your dehydrator to dry more. If you leave it, it will mold. Don’t let it mold. Dry it some more.
If you do see mold, toss the cherries.
7. Store in an airtight container.
Keeping your dried fruit stored properly is key to their taste AND to your health.
An airtight container is all you need. A canning jar, vacuum seal bag, reused commercial jar, etc.
Oven Directions
Prep: Preparing cherries in an oven is the same as drying in a dehydrator.
Drying time: 150F for 10-12 hours. If your oven does not go this low (many don’t), prop the door open a bit with a wooden spatula or spoon. Keep a sharp eye out on your cherries so that you don’t burn them – which will be easy to do in an oven. We’re wanting to dry them, NOT cook them. So don’t even think of turning the temp up a little to help them go faster 😉
Storage: Same as above storage methods.
Uses for dried cherries
- Add to trail mix, energy bars or granola (after baking, not during for granola)
- Add to oatmeal
- Rehydrate to make hand pies
- In baked goods
- To infuse alcohol
- Salads
- Make jams and butters
- Compotes
- Use as you would raisins in pies, cakes or muffins
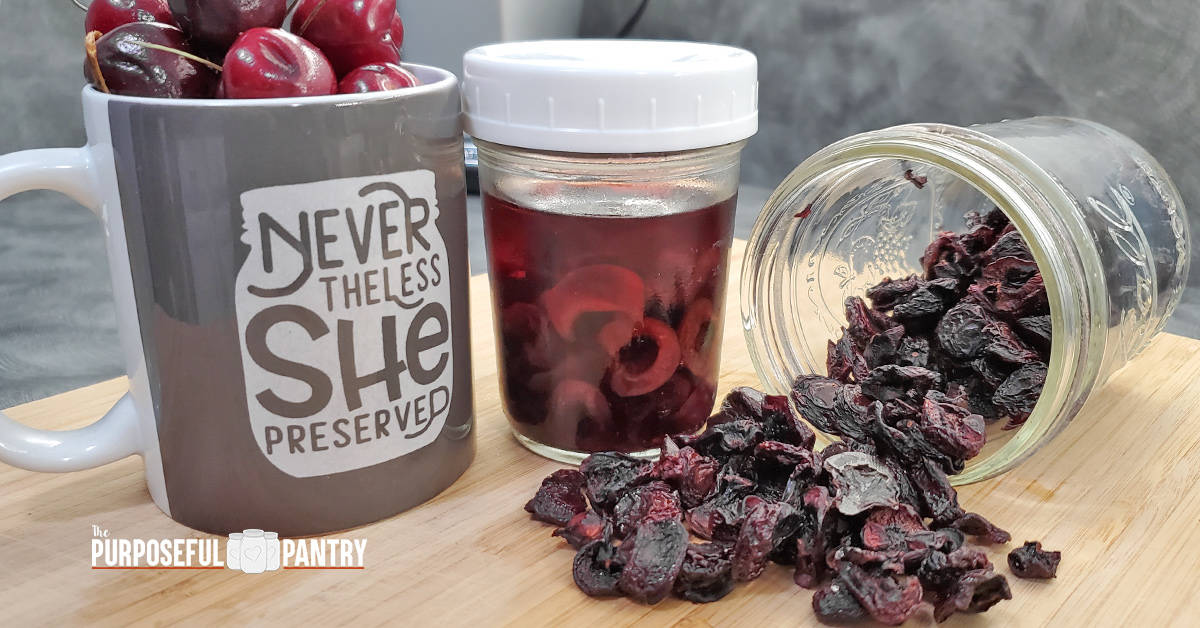
How to Rehydrate Dried Cherries
Reconstituting dried cherries can be done in a number of ways using
- Water
- Alcohol
- Fruit juice
Water Bath Version:
Place cherries in a bowl of near-boiling water, cover, and allow them to sit for about 15 minutes.
Overnight Soak Method:
Place cherries in an airtight container of your choice, cover with water, and allow to sit in the refrigerator for approximately 6-8 hours.
Stovetop Simmer method:
Simmer cherries in the liquid of your choice in a bowl on the stovetop for approximately 10 minutes. Keep a close eye out so that the juice doesn’t burn and the cherries don’t cook.
Dehydrated Cherries Questions
Properly dried, conditioned, and stored, cherries should last about a year in your pantry. You may get longer, but fruits tend to begin to change texture after about that long.
Yes, you can! I’ve shared some tips on this post to dehydrate cherry stems and pits and how to use them!
They do! And it’s much less work than canning cherries, especially if you aren’t an avid canner or don’t can at all!
More ways to preserve cherries
Want to learn more awesome ways to preserve cherries? Here is a specific how to freeze cherries post if you want to do something quickly, because the freezer makes preserving cherries easy! But there are so many more ways to preserve cherries you may also be interested in!
DEHYDRATOR MAINTENANCE TIP
I line the bottom tray of my dehydrator to keep it protected from drips and crumbs. This makes tidying up a little easier. You can use any of the Excalibur lining sheets if you have them, or get the budget-friendly sheets if you don’t. I’ve used any of them at varying times. Heck, even if you use some parchment paper or newspaper – anything to help protect and make cleanup a little easier.
How to Dehydrate Cherries
Ingredients
- Cherries
Instructions
Dehydrator Instructions
- Wash and destem, and pit cherries
- Slice or quarter (or smaller if you prefer smaller chunks in oatmeals or breads) and place on dehydrating trays lined with mesh, fruit leather sheets, or parchment
- Dry at 135°F / 57°C until leathery dry
- Condition
- Store in an airtight container
Oven Directions
- Place on oven-safe cooling rack stacked on a tray or your dehydrator trays if your oven goes down to 170°F / 76°C
- Dry for 10-12 hours at 170°F / 76°C until dry and leathery.
Video
Darcy’s Tips
Nutrition
Nutritional information is an estimation only. Nutrient information for dehydrated foods is based on fresh. Use 1/4 of the servicing size for the same nutrient information. Thus 1 Cup of fresh fruit has the same sugars as 1/4 dried.
©ThePurposefulPantry. Photographs and content are copyright protected. Sharing of this recipe’s link is both encouraged and appreciated. Copying and/or pasting full recipes to any social media is strictly prohibited.


Everyone should invest in a good dehydrator. As far as I’m concerned, it is a vital piece of kitchen equipment.
I’m currently dehydrating cherries and will add this to my previous stash. I love to add them to apple crisp along with dried blueberries. Delicious.
I just dehydrated a batch of frozen cherries. I pureed them first like I did when I followed your instructions for blueberries (which turned out perfectly. Thanks!) and then dried them until they were crisp. When I ground them up they just clumped right back into cherry size balls that won’t break back up. Any thoughts on what I might have done wrong? (They’re in the oven for fifteen minutes now in the hopes they’ll break up when they come out)
Might not have been fully dry to start with? They might have been processed too long/got too hot and the sugars have clumped from the heat. Were they in any syrup or just fresh?
Purchased 6.5 # frozen sweetened tart cherries in Door Co, Wi yesterday, and will dehydrate in oven at 135 deg soon. They are thawing now, will pour off juice and hope to have nice supply of cherry raisins in day or two. Any pointers?
Only what’s already in the post 😉 Have fun.
I use that same cherry pitter. Many thanks for this info. If you try to preserve in alcohol, my experience is that both the alc and the cherries lose all their flavor. Will they dry on a parchment sheet? Or does it simply take longer that way in the dehydrator? I have a new BioChef Arizona SOl dehydrator but have not used it yet – it has a rear fan rather than a top fan, so it might be fine on parchment. Any advice?
They will dry fine on parchment if that’s what you have.
Thank you
I dried them for 24 hrs and they’re dried but kinda sticky like raisins. Is that what I want? Or dry some more?
Again -follow the steps. If they are sticky, they are not dry. If you feel they are dry, condition to test.
I did not cut the cherries when I dehydrated them (at 115 degrees) and it took days….there was some black soot that squeezed out of some of the cherries during the process but I kept dehydrating ….did I ruin the batch by not dehydrating at a higher temp and also by not cutting them?
Cutting them in half and drying at 135F gives you the most efficient results, so if you’re doing whole at 115F, it’s going to take a very long time for them to dry. I don’t know what you saw, so can’t comment on what that is, but if they have begun to mold from inside if they aren’t drying – maybe that’s what it is? If you could take a photo and send it to me, it’d be more efficient to help – thepurposefulpantry at gmail dot com
Since cherries have to travel across country to get to me, have you tried frozen cherries?
I’ve not done frozen, but you can do them. The problem will be making sure the skin breaks fully for a more efficient drying time. It will be better to let them thaw first because they are so dense compared to other berries.
Thanks, it’s quite informative