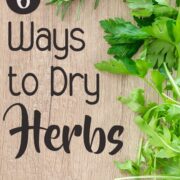
7 Ways to Dry Herbs
This post may contain affiliate links. We may earn a commission if you purchase via our links. See the disclosure page for more info.
Drying herbs is the best way to keep your summer bounty useful all year long! It’s also one of the easiest ways to introduce yourself to the world of drying or dehydrating. You don’t need a big-budget, food dehydrator or freeze-dryer to dry herbs, you can just use something you probably already have at home.

This post may contain affiliate links. Read our disclosure policy here.
Do you plant an herb garden every year, only to be overwhelmed by the abundance of herbs that grow throughout the gardening season?
Or perhaps you’ve purchased loads of fresh herbs from the farmer’s market or grocery store for recipes you plan on making, and are now left with extra that you know will just rot in the fridge, but you have no plans on cooking the rest of the week.
Instead of ending up with soggy green bags of slimy plant material in your fridge, use the excess to dry and stock your pantry herb selection with freshly dried herbs. They taste so much better than the dried herbs in the grocery store that may have been there for months before you ever purchase them.
Prepare Your Herbs
- Harvest herbs during the early morning. Give them time to allow the dew to dry, but don’t wait until the hottest part of the day.
- Go through your herbs and remove any damaged leaves, stems, or debris.
- Wash herbs under cool water. If I’ve grown my own, I simply rinse to remove dust and any odd debris. If I’ve purchased from the grocery store, I might choose to wash in equal parts of water to vinegar. Or you can purchase a pre-made version (like this one from Amazon). Simply spray leaves and allow to soak for a few minutes, then rinse as per directions.
- Lay your herbs out on a lint-free, absorbent cloth (I love tea towels for this reason), and allow them to air dry. Or you can pat dry with a second cloth. Another alternative is to use a salad spinner to quickly remove the excess moisture from the leaves. I find the salad spinner the quickest way to do this if I have a large quantity of herbs to do.
7 Ways to Dry Fresh Herbs
1. Air Drying Herbs
This method is great for those long-stemmed herbs such as rosemary, sage, parsley, thyme, mint, basil, dill, and marjoram. This is a favorite way to preserve herbs because it keeps their flavor and colors bright.
Plus, it makes a kitchen feel so comfy and cozy with bundles of herbs hanging to dry!
You’ll want to gather up your herb stems into small packets or bunches of no more than three or four stems.
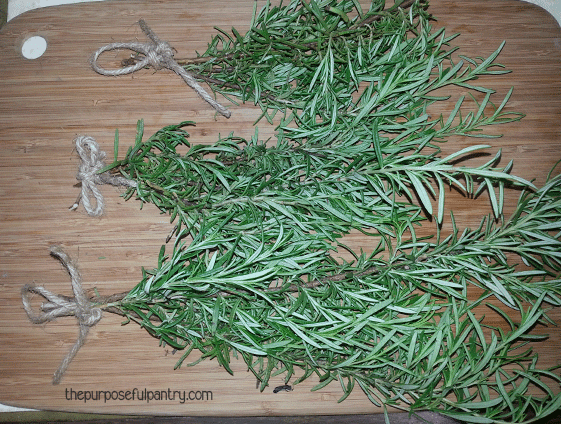
Tie the bundles together using twine, string, ribbon, rubber bands, or anything you have handy. Don’t overpack those bundles as you do want good air circulation to prevent mold.
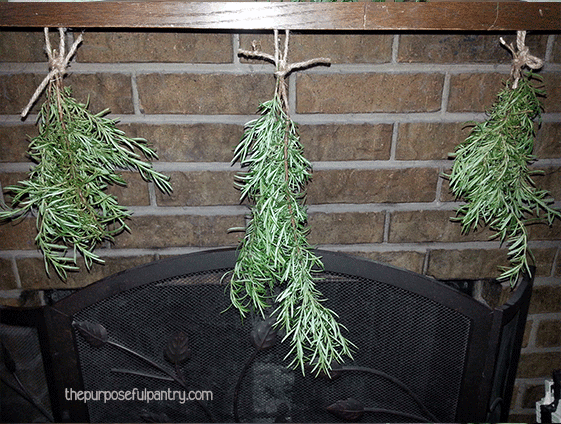
Hang your herb bundle upside down in a well-ventilated, dust-free area.
TIP: You can put paper bags over your bundles if you worry about the dust. Just punch a few holes in all sides of the paper bag to facilitate airflow.
2. Use a hanging rack or screens to dry herbs
You can use old window screens or build a simple drying rack from 1×1’s and windows screen material stapled to it. Then lay your herbs in single layers. You can put a block between screen squares and stack them. This works similarly to hanging them, but can work outside in a protected area.
Alternatively, you can use a hanging mesh rack. This allows you to hang indoors or out – and not worry about those pesky insects trying to nest in your food!
3. Dehydrating Herbs with a Dehydrator
By far my favorite way to dry herbs is using a food dehydrator. You can set the temperature to be perfect for drying herbs, which is approximately 95°-100°F. This way, you aren’t cooking out more nutrients than necessary.
Simply prepare your herbs, place on the trays provided, turn on your machine, and between 4-12+ hours (depending on the herb you’re drying, the size of the leaf, your home’s humidity, etc.).
I love using my Sahara Folding Dehydrator for this. Not only does it fold away when not used, it has an air-only feature that allows air to push across the herbs to dry them faster than simple air drying, it does not use heat, so preserves all the flavor!
4. Dry Herbs in the Oven
Oven-drying herbs is easy, but be careful not to allow them to cook. They will lose a lot of flavor with high heat or even burn, so follow these steps:
- Set your oven to the lowest temperature setting.
- Place your herbs on a grill or tray then place in your oven.
- Close the door, but put a metal spatula or oven mitt or something in the door so it stays open.
Safety Tip: Do not walk away from the oven. It’s a safety hazard, and you want to ensure no one gets burned or the mitt catches fire.
You want to allow the heat to escape, not to cook the herbs – just dry them. You’ll have to check often to see if they are dry enough, as all herbs take different amounts of time depending on what they are. It may take 3-4 hours, but check often.
Alternatively, you can use the pilot light (or your oven light) and place your herbs to dry without the additional heat.
5. Microwave Herbs to Dry
- Place herbs in a single layer on a microwave-safe plate (use a paper towel if desired).
- Process on high for 30 seconds.
- Check herbs.
- Process in five-second intervals until the herb is fully dry.
- Most herbs will be paper dry or crumble easily when fully dry.
They can get hot, so be careful not to scorch them.
6. Drying Herbs on a Car Dashboard
Believe it or not, laying your herbs out on a car dashboard on a sunny day will dehydrate them about as quickly as leaving them in the oven. You’ll need to make sure that you crack the windows to allow moisture and heat to escape the car, just like with an oven. You don’t want to cook the herbs, you want to dry them out. Cooking them removes more of the nutrients.
7. Use a Freeze Dryer
Freeze dryers are quite the commitment. They aren’t for those with faint hearts, either.
But freeze dryers work in ways that are different from a dehydrator and allow you to make a variety of items, including meats and dairy, shelf-stable the way you can’t do with a dehydrator.
Surprisingly – herbs are also better preserved with a freeze dryer. They keep their color and shape better. They take anywhere from 1/4 to 1/2 as long to dry, and cost about the same per use to dry as a conventional dehydrator (you have to factor in that initial cost and maintenance of the machine).
How to Store Dried Herbs
- Allow your dried herbs to come to room temperature.
- Strip stems of leaves.
- Lightly crush the leaves in your hands onto a flexible mat.
- Store in clean, airtight containers or jars that don’t allow light (for best shelf life) or any of these awesome tips for storing dried herbs. Glass canning jars are fine to use, but it’s best to store them in a dark, cool, dry place for optimal storage. Direct sunlight can reduce the shelf life of herbs.
- Label containers – don’t forget this part. Really. You think you’ll remember…but you won’t. Then you’ll end up with all these little bottles of herbs that look vaguely alike, and your sense of smell will be quickly confused. In most cases, mixing up herbs might not really matter…but I don’t think you want dried lavender in your stew — or maybe you do!
What to do with the stems?
I toss my stems into the compost pile or add them to a baggie for flavoring broth later. What do you do with the stems?
How To Dry Herbs Master List
- Basil
- Bay Leaves
- Carrot Tops (yes, you can treat these as an herb to substitute for parsley!)
- Cilantro
- Dill
- Mint
- Parsley
- Oregano
- Rosemary
- Tarragon
- Thyme
- Greens (while not herbs, I treat them as herbs to keep as much of the nutrients and flavors as possible)
No matter which version you choose, drying herbs is easy with any of these 6 ways to dry herbs. Pick one and get started today!
Questions about Herbs
All herbs can be dried. Whether air-dried or dried at under 100°F, even delicate herbs can be dried. Hotter temperatures tend to deplete flavor, so that is why we dry herbs with a dehydrator at low temperatures. Cilantro, tarragon, and chives have much less flavor dried than fresh, and might benefit from being frozen first, but for shelf-stable storage, drying is fine. Use more when cooking!
Dried herbs are usually used duing the long-cooking process, fresh herbs used more for short cooking processes or added at the very end of a slow-cook to add extra freshness. Reduce recipe to 1/3 when using dried to fresh. So 1 Tablespoon of fresh herbs should be reduced to 1 teaspoon dried. Ultimately, do it to your own preference. Like more? Use more.
All herbs are great to dry, though some can lose flavor with heat. So if using a food dehydrator, use the lowest possible setting to keep all the flavor you can!
Dried herbs are optimally stored for about six months. However, as long as you can easily identify the herb by smell, after crushing it, it is still great to use. To keep them longer, store in the freezer.


Do you prefreeze the herbs when freeze drying? I often don’t have enough available at once to have a full run.
Personally, I wouldn’t bother pre-freezing. Most foods need it, but herbs are done so quickly it’s not necessary. You can collect if you want to run a full cycle if you prefer.
Thank you Darcy, for sharing your knowledge, for showing us how-to, and for being down to earth and real. I am trying scallions for the first time and after conditioning them, find that there is no trace of moisture in the bottles and they are dry but not crisp. Do they have to be dehydrated some more or can they be bottled with a dessicant? Many thanks, Irene.
If they are not dry, never put them up for storage. They don’t have to be ‘crisp’ to be dried, especially with more fibrous things. Desiccants are there to control moisture that is introduced with opening and closing the jar, never to finish the job.
I use a cinnamon stick to prop my oven door open with. The heat from the oven causes the cinnamon stick to give off a cinnamon aroma. No need to worry about fire because your herbs will catch fire long before the cinnamon stick does.
Also cinnamon sticks Glade in cupboards, on shelves and on window sills help keep away ants and other pesky insects.
Don’t waste money the really good sticks for this. Just buy a bag of cheap cinnamon sticks from the dollar store. They’re usually cheapest around the holidays. That’s how I “officially” start my holiday baking season; I purchase a bag of cheap cinnamon sticks.
When you dry them in the dehydrator how do you keep, like basil, from blowing around? I have an Excalibur dehydrator.
Thanks ?
Leave it on stems, use another piece of mesh or parchment paper on top. Don’t open the dehydrator until the fan comes to a full stop. Don’t start it until the door is closed.
I just love hat you are offering us …thank you so much!!! I like how simple you make this sound. Another method is to put your screens in front of a fan. I usually have a few fans going anyways. Dries them beautifully and with in a few days. Again Thanks and God Bless you!! Dawnrose
Great tip!
Thanks for this! My herbs are doing better than ever this year and I want them to last all year long!
A question I had for you is how long do you hang your herbs for, usually?
There’s no way to tell – it will depend on your home’s humidity, high tightly packed your bundles are, how much air movement is around them, etc. Expect them to take a few weeks.
The worksheet did not post for a few of these.. Dill, Parsley, thyme and tarragon are missing 🙁