How to Dehydrate Kiwi
This post may contain affiliate links. We may earn a commission if you purchase via our links. See the disclosure page for more info.


Learn how to dehydrate kiwi to create some delishly sweet and sour chips that are great for healthy snacks that your kids will love for their lunches. And you’ll secretly love them, too!
This post may contain affiliate links. Read our disclosure policy here.
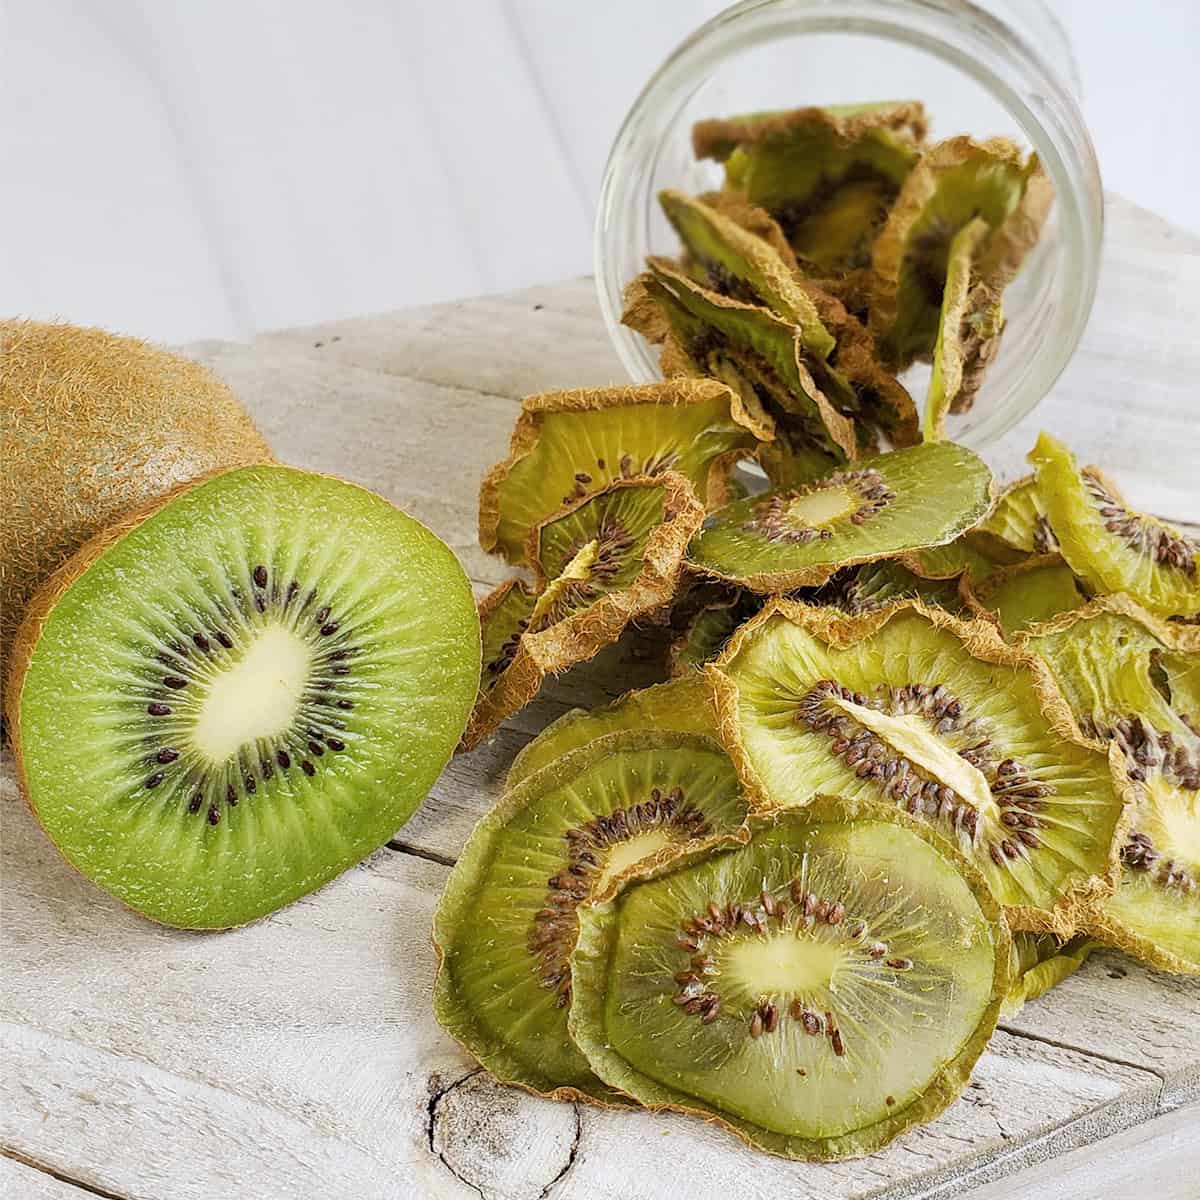
Dried kiwi is like nature’s sweet and sour candy. It makes can be sweet with a sour afternote. Or, depending on the kiwi, it can pucker you up with a tart bite that kids love. You’ll love it even more because it’s a healthy snack alternative for kids’ school lunches and treats!
This also makes an awesome first dehydrating project for kids to do to learn how to work in the kitchen and dehydrate their own snacks!
Dehydrated foods are a super way to teach your kids about no-waste living, food preservation, science, math, and more!
How to Dehydrate Kiwi
Dehydrating kiwi is an exceptionally easy project for beginners. You only need a knife and some fruit, and an oven if you don’t have a dehydrator.
You can choose to use a knife, but you’ll get more even cuts with a mandoline (which you can see in the video below). But please make sure to use a cutting glove with your mandoline! Your fingertips will thank you for it!
Instructions
Quick instructions: Peel and slice into 1/4″ slices, drying at 135°F/57°C for between 8-12 hours or until slices break easily once cooled.
Step One: Wash kiwi fruit well.
You can soak in a sink of just water, or do a 50/50 vinegar wash. This is to help remove any residual dirt and any loose fuzz, though it won’t remove all the fuzz.
You’ll want to use ripe kiwi for best flavor.
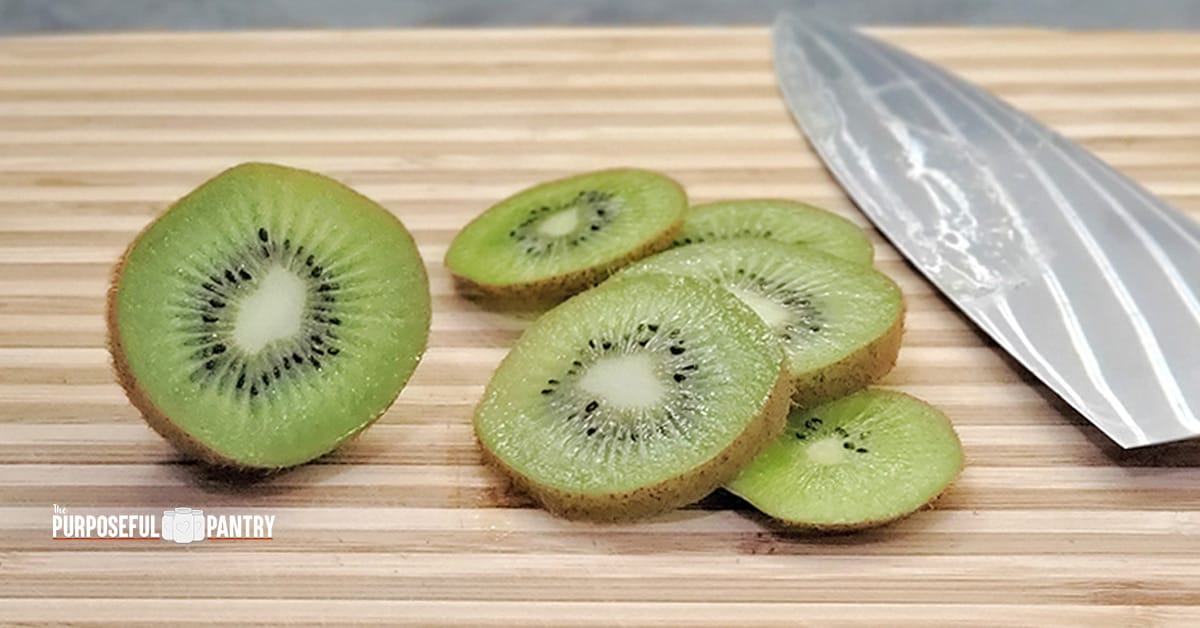
Step Two: Peel and Slice
Peel the kiwi if you wish. A vegetable peeler works as well as a handy paring knife. Sometimes it’s easy to cut in half and just scoop the inside with a spoon.
Slice into 3/16″ slices. This is a little thinner than 1/4 inch (6 mm). I find it’s our preferred slice on the mandoline. But if I’m cutting with a sharp knife, I shoot for about 1/4 inch thick slices. Don’t worry about getting them exact!
Tip: Try the fruit both ways. Some people don’t like the texture of the skin on dried kiwi fruit, and others like it. It’s definitely personal perference.
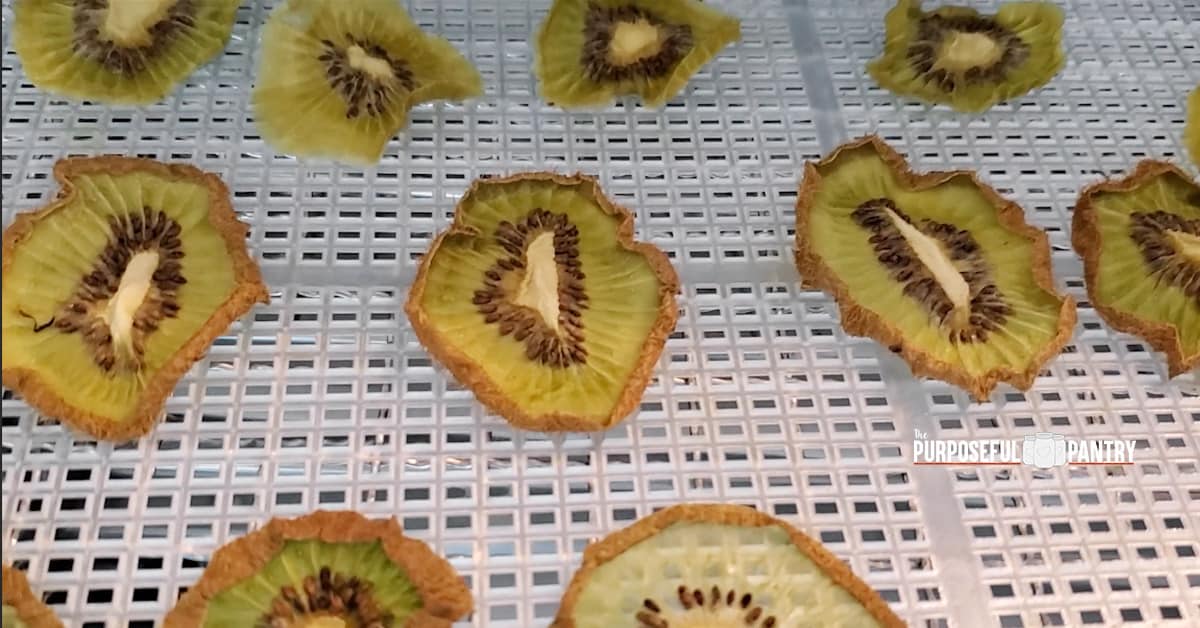
Step 3: Dehydrate at 135°F/57°C for 8-12 hours.
Place slices on your dehydrator trays. You will want to use some sort of liner to keep the kiwi from sticking to your trays. You can try one of these best dehydrator tray liners (mesh, parchment, etc.)
Use this handy dehydrating magnet to know your temperatures all the time!
Step 4: Dryness Test
Kiwi slices are dry when they are dry and leathery, pliable, but break easily. If yours are not at that stage, dry some more.
Step 5: Storage
Condition your kiwi for a week if planning on storing for longer than a week. Otherwise, just store your dehydrated kiwis in an airtight container, such as a canning or mason jars, and enjoy!
Your dried kiwi chips should last about a year in an airtight container in dark, cool, dry pantry or storage space. Storing in a zip top bag is fine for a few days, but you’ll want something more airtight for long term storage.
Storage
- Condition for at least 5 days if you are not eating these immediately.
- Store for up to a year in an airtight container with a moisture absorber if you prefer to help control the moisture in a jar you open a lot.
How to Condition
Conditioning dehydrated foods is a way to test to be sure the moisture has equalized in your container and that there is no excess moisture.
- Place food into a jar with enough room to move.
- Shake once a day for 5-7 days.
- Look for any signs of moisture buildup: Food sticking to the sides or bottom that won’t easily shake off, clumping, moisture beads on food or jar.
- If you find these issues, place food back into the dehydrator to dry more.
- If you see any mold, toss everything out and sanitize your jar.
Want to learn even more about conditioning? Check out this How to Condition Tutorial.
Oven Directions
- Preheat the oven to its lowest temperature.
- Wash kiwi fruit. Peel if desired.
- Cut into 1/4″ slices (6mm).
- Place on parchment paper-lined cooking trays. Then place those trays onto cookie sheets.
- Place in oven.
- Crack the door open with a heat-proof silicone mat or wooden spoon if possible.
- Dry for 4-6 hours, but watch for burning. Flip kiwi chips over a few times during the process to help stop sticking and control over heating.
- Condition.
- Store.
Nutritional note: When you dehydrate kiwi, carb numbers stay the same, so if you are watching your carb count, be mindful. 1 cup of fresh kiwi equals 1/4 cup of dried kiwi, but their calorie count is the same. (resource: WebMD)
More Fruit Dehydrating Ideas
Watch Me Dehydrate Kiwi Fruit
Frequently Asked Questions
Kiwi skin is edible, but you will want to try it peeled and unpeeled to see which you prefer for the dried fruit. The texture may be something that you don’t mind at all, or you may not like it. It really is a personal preference.
Either regular kiwi or golden kiwi will work for this project.
Dehydrate Kiwi
Equipment
- Knife if you don't use a mandoline
Ingredients
- Kiwi
Instructions
- Wash
- Slice 1/4″ slices (6mm)
- Dry at 135°F / 57°C for between 8-12+ hours
- Condition
- Store
Video
Darcy’s Tips
Kiwi slices are dry when they are dry and leathery, pliable, but break easily. If yours are not at that stage, dry some more. Store: up to a year with moisture absorbers Oven Directions:
- Preheat oven to its lowest temperature.
- Wash kiwi fruit. Peel if desired.
- Cut into 1/4″ slices (6mm)
- Place on parchment paper-lined cooking trays. Place those trays onto cookie sheets into the oven.
- Crack the door open with a heat-proof silicone mat or wooden spoon if possible.
- Dry for 4-6 hours, but watch for burning or over-browning.
Nutrition
Nutritional information is an estimation only. Nutrient information for dehydrated foods is based on fresh. Use 1/4 of the servicing size for the same nutrient information. Thus 1 Cup of fresh fruit has the same sugars as 1/4 dried.
©ThePurposefulPantry. Photographs and content are copyright protected. Sharing of this recipe’s link is both encouraged and appreciated. Copying and/or pasting full recipes to any social media is strictly prohibited.


I thought you had a post that said dehydrated food didn’t need oxygen absorbers if we vacuum seal this. Is this correct? Thank you.
https://www.thepurposefulpantry.com/how-to-store-dehydrated-foods
Thanks Darcey as always I did about 8.